Welcome to Doughin It
At Doughin It, we believe great bread starts with patience, simplicity, and a little bit of love. Our sourdough starter is 100% all-natural, made completely from scratch using just flour, water, and time—nothing artificial, nothing rushed.
What began as a passion for traditional baking turned into a mission to make sourdough more approachable for everyone. Our starter is carefully cultivated and maintained to be strong, active, and reliable, whether you’re baking your very first loaf or perfecting your craft. Each culture is alive, thriving, and ready to help you create bread that’s flavorful, wholesome, and deeply satisfying.
We honor the old-world tradition of fermentation while keeping things simple and modern for today’s kitchens. No shortcuts, no preservatives—just real sourdough, the way it was meant to be.
Because good things take time. And when it comes to sourdough, you really do have to Doughin It.

About Us
Learn
What is a starter
A sourdough starter is a natural, living culture made from just flour and water that’s used to bake sourdough bread. Over time, it captures wild yeast and beneficial bacteria from the environment, which work together to help dough rise and develop its signature tangy flavor. Unlike store-bought yeast, a starter ferments slowly, giving sourdough its chewy texture, rich taste, and easier-to-digest qualities. With regular feeding and care, a sourdough starter stays alive and active—meaning you can use it again and again to bake fresh, flavorful bread right at home.
What you need
Flour – All-purpose or bread flour works great. Whole wheat or rye can boost activity, especially for sluggish starters
Water – Clean, non-chlorinated water (filtered)
Sourdough starter – Doughin It starter!
Container – A clean glass jar or bowl with room for the starter to grow
Utensil – Spoon or spatula for mixing
Cover – Loose lid, cloth, or paper towel (it needs to breathe, not seal airtight)
Optional but helpful
Kitchen scale – For consistent feeding ratios
Rubber band or marker – To track how much it rises
PLEASE try to feed the starter as soon as possible when it arrives
Totally normal: a tangy/sour smell, a little liquid on top, or it looking tired and flat.
2) Give the starter a stir
If it smells strong, don’t worry—that usually settles after a couple feedings.
3) Pour the starter into your jar
4) Add ¼ cup flour to the jar.
Add 2 tablespoons water (then add 1 teaspoon more if it’s too thick).
Mix until no dry flour remains.
If you’re using a scale (most consistent):
Add 50g water and mix.
Add 50g flour and mix until smooth.
5) Check the texture
Your goal is a thick batter texture—like pancake batter or soft mashed potatoes
6) Scrape down the sides of the jar.Mark the starter’s starting level with a rubber band/marker.
Cover loosely (lid not tightened, or cloth/paper towel + rubber band).
8) Repeat feeding daily for the first few days
Because shipping can stress it, do this for 2–3 days:
Feed once every 24 hours at room temp
How to feed
Recipe
Provide a general summary of the services you provide, highlighting key features and benefits for potential clients.
Steps
Step 1:
In a large bowl, add:
Water
Sourdough starter
Stir briefly with a spoon to break up the starter.
Add the flour and salt.
Mix together until no dry flour remains.
What it should look like:
Shaggy, rough, and slightly dry
Not smooth or elastic yet
This is normal.
Step 2:
Cover the bowl with:
Plastic wrap
Or a very damp kitchen towel
Let the dough rest for 1 hour
Step 3:
Start your stretch and folds (repeat this step 4 times)
Wet your hand slightly.
Grab one side of the dough, stretch it up, and fold it over the center.
Turn the bowl ¼ turn.
Repeat 4 times total.
Cover and rest 30 minutes.
Step 4:
Bulk fermentation
Let the dough rise at room temperature (68–70°F).
Time range: 3–12 hours
Warmer room = faster rise
Cooler room = slower rise
The dough is ready when:
It has doubled in size
Looks puffy and airy
Has visible bubbles along the sides
Feels lighter when moved
Step 5:
Once doubled:
Lightly flour your work surface.
Gently turn out the dough.
If making two loaves, divide now.
Using gentle movements:
Fold the edges toward the center
Create surface tension without deflating
Step 6:
Proofing
Place dough seam-side down in proofing basket
Refrigerate 12–48 hours for better flavor and easier scoring
The dough is ready when:
Slightly puffy
Slowly springs back when gently pressed
Step 7:
Place a Dutch oven (or oven-safe pot with lid) inside the oven.
Preheat to 450°F (232°C) for 30–45 minutes
Step 8:
Turn dough onto parchment paper.
Using a sharp blade or lame, score a 2–3 inch slash about ¼ inch deep.
Step 9:
Carefully place dough (on parchment) into the hot pot.
Cover with lid.
Bake:
30 minutes covered
Remove lid
Bake another 15 minutes uncovered
Step 10:
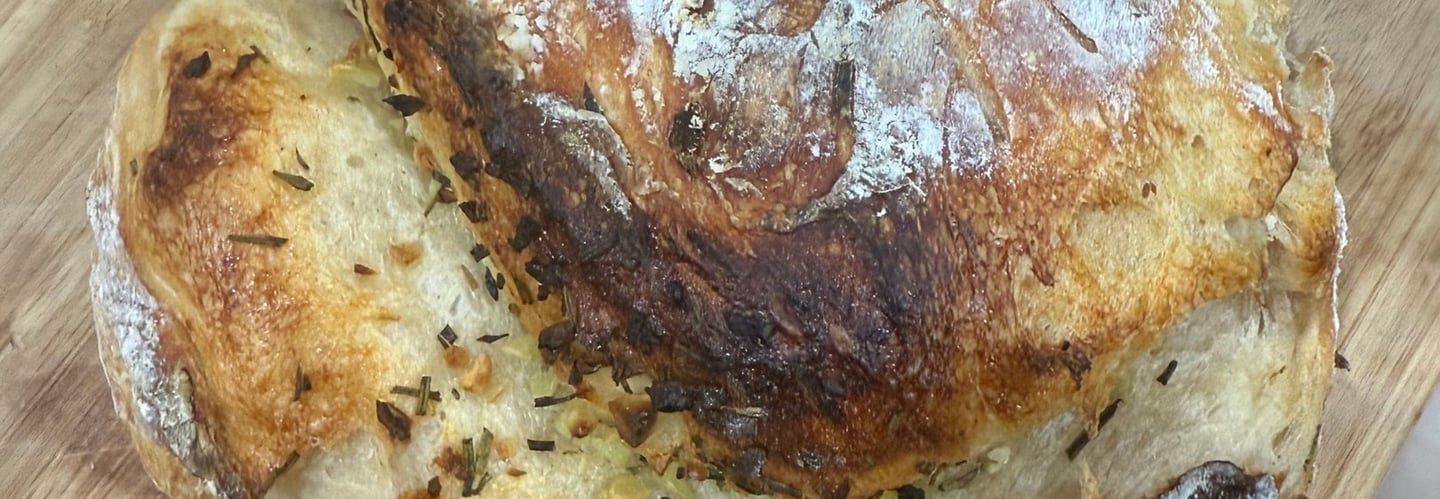
Let the loaf cool down and try it!!
Ingredients
Combine:
100 g of sourdough starter
350 g room temp filtered water
500 g bread flour (such as King Arthur)
10 g salt
Mixing bowl
Something to mix with
Scale
proofing basket
Dutch ovan
Troubleshooting
Thank you so much for your purchase from Doughin It, and for the time, patience, and effort you’ve put into caring for your starter. I’m truly sorry it didn’t work out for you right away, and I completely understand your frustration—sourdough is a living culture and it can take a little practice, especially at the beginning. The good news is that starter issues are almost always correctable, and I fully stand behind my product and guarantee success. During shipping, the starter goes into a temporary hibernation stage, so it typically needs to be fed daily for up to six days to return to full strength—sometimes it bounces back after just one feeding, and other times it takes the full few days, both of which are completely normal. Any strong or unpleasant smell is simply a sign that the starter is hungry; as it consumes flour, it naturally produces acids and gas, and once fed, the smell mellows and becomes much more pleasant. Since the ingredients are only flour and water, nothing can truly spoil, and even a grayish hue is just a sign of hunger, not anything harmful. In nearly all cases, issues come down to feeding misunderstandings rather than a dead starter—if it has been fed at all in the past few days, it is scientifically not dead, as mature starters are extremely resilient. Feeding is one simple step repeated daily: whatever amount of starter you keep, feed it the same amount of flour and the same amount of water (a 1:1:1 ratio by weight), and as the starter grows, the feeding amounts naturally increase. It’s also completely normal for the starter to rise and bubble for several hours after feeding and then fall back down by the next day—this daily rise-and-fall cycle often causes confusion but is expected. The most common issues I see are using bleached flour, feeding by volume instead of weight, not increasing feeding amounts as the starter grows, or using chlorinated, distilled, or overly purified water, which can harm the culture. If activity hasn’t returned after about six days, a larger feeding (such as a 1:2:2 or 1:3:3 ratio) or a few feedings with bread flour or whole grain will almost always jumpstart it. I truly appreciate your business and the opportunity to help, and I’m more than happy to resend a fresh starter so you can experience Doughin It the way it’s meant to be.
Common Questions
“It smells like sour vinegar / nail polish”
That usually means it’s hungry or stressed from travel. Keep feeding it—this almost always improves within 1–3 feedings.
“There’s liquid on top”
That’s called hooch. It’s normal. Stir it in or pour it off, then feed.
“It isn’t bubbling much yet”
Also normal after shipping. Give it time, warmth, and a couple feedings.
“Can I use it right away?”
Sometimes yes, but for best results, wait until it’s rising strongly and predictably (often day 2–4 after arrival).
“I forgot a feeding.”
It’s okay—just resume the routine.
Discarding
Sourdough discard is the portion of sourdough starter that you remove and throw away (or save for other recipes) before feeding your starter.
When you feed your starter, you add fresh flour and water.
If you never remove any starter, it will:
Grow larger and larger
Use up huge amounts of flour
Become unbalanced and weak
Discarding keeps your starter healthy, manageable, and active.
You can use your discard for other recipes
You discard:
Before feeding your starter
Most commonly during:
Starter maintenance
Daily or weekly feedings
Starter development (new starters discard more often)
You do not discard after feeding.
Start with your existing starter
Let’s say you have 200 g of starter in your jar.Remove a portion
Scoop out and discard (or save) about half to two-thirds.
You might keep:50–100 g starter
Discard the rest.
Feed the remaining starter
Add:Equal parts flour and water by weight
Common ratio: 1:1:1
50 g starter
50 g flour
50 g water
Mix well
Stir until smooth and thick, like pancake batter.Cover loosely
Let gases escape (don’t seal airtight).
Storage
Long-Term Care (After It’s Active)
Bake regularly or store in the fridge and feed weekly
Always feed before baking for best results
Final Note
Your sourdough starter will grow stronger with time and care. The more consistently you feed it, the better it performs—and the better your bread will taste.